Welcome to the Craftsman Garage Door Opener Manual, your comprehensive guide for installation, operation, and troubleshooting. This manual ensures safe and efficient use of your garage door opener, covering essential safety guidelines, step-by-step installation, and maintenance tips for optimal performance. Designed to help you master your opener’s features, it serves as a quick reference for first-time users and seasoned homeowners alike.
- Comprehensive guide for setup and operation.
- Covers safety, installation, and troubleshooting.
- Includes maintenance tips for longevity.
- Perfect for both new and experienced users.

Safety Rules and Precautions
Read and follow all safety rules and operating instructions before first use. Fasten the manual near the garage door for quick reference. Ensure the door is balanced and properly secured to avoid accidents. Only operate the opener at 120V, 60 Hz to prevent damage. Never leave unattended devices in operation with sectional doors. Always disable locks before installation and operation.
Essential Safety Guidelines for Installation and Operation
Always read and follow all safety rules and operating instructions before starting. Ensure the garage door is properly balanced and securely fastened to prevent accidents. Keep the area clear of obstacles and people during installation and operation. Use only the recommended tools and voltage (120V, 60 Hz) to avoid damage or malfunction. Regularly inspect the door and opener for wear or damage. Never operate the opener if the door is unbalanced or damaged. Test safety features like auto-reverse regularly. Secure loose clothing and long hair to avoid entanglement. Supervise children when the opener is in use to ensure their safety. Failure to follow these guidelines may result in injury or damage.
- Ensure proper door balance and security.
- Use only recommended tools and voltage.
- Regularly inspect for wear or damage.
- Test safety features like auto-reverse.
- Supervise children during operation.
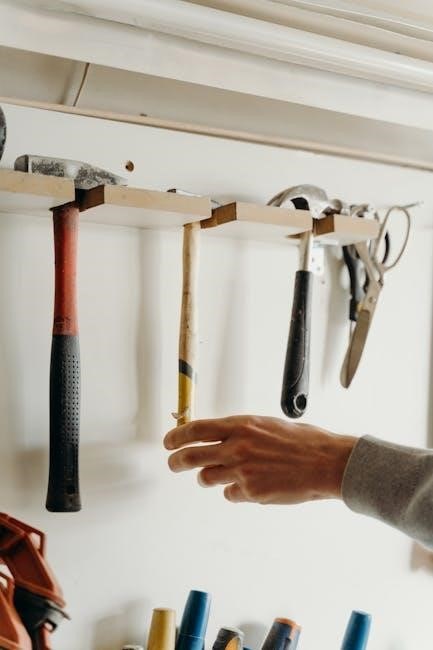
Installation and Assembly Instructions
Follow the step-by-step guide for proper setup and adjustment. Use hand tools as specified in the manual. Ensure compatibility with one-piece or sectional doors. Always refer to the instructions for accurate assembly and installation.
- Use hand tools as specified in the manual.
- Ensure compatibility with one-piece or sectional doors.
- Refer to instructions for accurate assembly.
Step-by-Step Guide for Proper Setup and Adjustment
Start by carefully unboxing and inventorying all components. Follow the manual’s instructions for assembling the rail and attaching the trolley. Mount the opener bracket securely to the ceiling, ensuring proper alignment. Tighten all screws firmly. Connect the door arm to the trolley and adjust the spring tension according to the door’s weight. Align the safety sensors and test the door’s movement. Adjust the opener’s limits to ensure smooth operation. Finally, test the door’s full cycle and verify all safety features are functional. Refer to the manual for detailed diagrams and specific torque settings to ensure a precise installation.
- Unbox and inventory all components.
- Assemble the rail and attach the trolley.
- Mount the opener bracket securely.
- Connect the door arm and adjust spring tension.
- Align safety sensors and test door movement.
- Adjust opener limits for smooth operation.
- Verify safety features and test full cycle.

Programming the Remote Control
Press and hold the remote button until the opener light blinks. Release and test the remote for proper function. Easy setup ensures seamless control of your garage door.
- Press and hold the remote button.
- Wait for the opener light to blink.
- Release and test the remote.
How to Program the Remote Control for Seamless Operation
Program your Craftsman remote control by pressing and holding the button until the opener’s light blinks. This ensures proper synchronization and reliable operation. Follow step-by-step instructions for effortless setup.
- Press and hold the remote button.
- Wait for the opener light to blink.
- Ensure proper synchronization.
Troubleshooting Common Issues
Identify and resolve issues like the door not moving or uneven operation. Check if the remote battery is dead or if the door is unbalanced. Ensure proper alignment and safety sensor functionality for smooth operation.
- Check remote battery and door alignment.
- Ensure safety sensors are clear and functioning.
- Verify the door is balanced and properly secured.
Identifying and Resolving Problems with Your Garage Door Opener
Common issues include the door not moving, uneven operation, or the remote control failing to respond. First, check the remote battery and ensure the opener is properly powered. If the door doesn’t close, inspect the safety sensors for alignment and obstructions. A blinking light on the opener indicates sensor problems. For uneven movement, check the door balance and track alignment. Lubricate moving parts if they appear worn or rusty. Refer to the manual for specific troubleshooting steps tailored to your model. Addressing these issues promptly ensures smooth and safe operation of your Craftsman garage door opener.
- Check remote batteries and power supply.
- Inspect safety sensors for alignment and obstructions.
- Ensure proper door balance and track alignment.
- Lubricate moving parts if necessary.

Maintenance and Care Tips
- Regularly lubricate moving parts for smooth operation.
- Check and clean tracks to ensure proper function.
- Inspect cables and replace worn or frayed ones.
- Ensure sensors are aligned and free from obstructions.
Regular Maintenance to Ensure Optimal Performance
Regular maintenance is crucial for your Craftsman garage door opener’s longevity and efficiency. Start by lubricating moving parts like rollers and hinges annually to prevent wear. Clean the tracks with a soft cloth and ensure they are free from debris. Inspect cables for frays or damage and replace them if necessary. Check the balance of your garage door to avoid unnecessary strain on the opener. Additionally, test the safety sensors monthly to ensure they function correctly and align them if needed. Following these steps will keep your opener running smoothly and prevent costly repairs down the line.
- Lubricate moving parts annually.
- Clean and inspect tracks regularly.
- Check and replace damaged cables.
- Test safety sensors monthly.

Compatibility with Other Devices
Craftsman garage door openers are designed to work seamlessly with various accessories and systems, including remote controls, smart home devices, and sensors for enhanced functionality and convenience.
- Works with smart home systems.
- Compatible with remote controls.
- Integrates with safety sensors.
Understanding Compatible Accessories and Systems
The Craftsman garage door opener is compatible with a variety of accessories and systems, enhancing its functionality. These include remote controls, keyless entry pads, and smart home devices for seamless integration. Additionally, it works with safety sensors and MyQ technology, allowing remote monitoring and control via smartphones. Compatibility extends to universal remotes, ensuring versatility and convenience. Regular updates and firmware improvements ensure optimal performance with modern devices. This wide range of compatibility makes the Craftsman garage door opener a versatile choice for homeowners seeking advanced features and integration capabilities.
- Compatible with MyQ smart technology.
- Works with universal remote controls.
- Integrates with safety sensors.
Warranty and Customer Support
Craftsman offers a comprehensive warranty and dedicated customer support. The warranty covers parts and labor for a specified period, ensuring protection against defects. For assistance, contact customer support via phone, email, or the official website. Additional resources, such as FAQs and manuals, are available online for troubleshooting and guidance.
- Comprehensive warranty coverage.
- Dedicated customer support team.
- Online resources for troubleshooting.
- Comprehensive warranty coverage for parts and labor.
- Dedicated customer support via phone, email, and online.
- Additional resources for troubleshooting and guidance.
- Unbox and inventory components.
- Assemble according to the manual.
- Charge the remote battery.
- Program the remote control.
- Secure the manual near the door.
- Test door operation.
- Unbox and organize components.
- Assemble the opener following instructions.
- Charge and program the remote control.
- Mount securely and test operation.
- Refer to the manual for troubleshooting.
Understanding Your Warranty and Support Options
Your Craftsman garage door opener is backed by a comprehensive warranty program, ensuring protection against defects in materials and workmanship. The warranty typically covers parts and labor for a specified period, providing peace of mind. For any issues, Craftsman offers dedicated customer support through multiple channels, including phone, email, and online resources. Additional support tools, such as FAQs, troubleshooting guides, and downloadable manuals, are available on the official website. This ensures quick resolution of concerns and easy access to information. Understanding your warranty and support options helps maximize the longevity and performance of your garage door opener.

Quick Start Guide
The Quick Start Guide provides an easy setup process for your Craftsman Garage Door Opener. Follow these steps for a seamless installation: unbox and inventory all components, assemble the opener according to the manual, charge the remote battery, program the remote control, secure the manual near the door for future reference, and test the door’s operation to ensure everything works smoothly.
Fast and Easy Setup for First-Time Users
Setting up your Craftsman Garage Door Opener is straightforward with the Quick Start Guide. Begin by unboxing and organizing all components. Follow the step-by-step instructions to assemble the opener. Ensure the door is balanced and properly aligned before installation. Charge the remote control battery and program it according to the manual. Mount the opener securely, ensuring all safety sensors are installed correctly. Test the door’s operation by pressing the remote button. If issues arise, refer to the troubleshooting section. Keep the manual handy for future reference. This quick setup ensures your opener functions smoothly from day one. Follow all safety guidelines during installation.